

Connect Relation links a Services post to the Service Provider post that belongs to the email recipient.
It is designed for JetAppointments workflows where the same WordPress user receiving the email also represents a provider in your Service Providers post type.
This feature is optional and should only be enabled when that relationship is part of your JetAppointments setup.
When to Use Connect Relation #
Use Connect Relation when all of these are true:
- you use JetAppointments;
- you have a Services post type;
- you have a Service Providers post type;
- the email recipients are expected to be service providers;
- the Service Providers post type stores the WordPress provider/user ID in a custom field;
- you need the submitted service post connected to the selected provider post.
If the email recipient has nothing to do with your JetAppointments providers, leave Connect Relation off.
Prepare JetAppointments First #
Set up your Services and Service Providers post types in JetAppointments before configuring Connect Relation in the email template.
The Service Providers Post Type used by this feature must have Custom Meta Storage enabled.
You also need to know:
- the Service Providers post type slug;
- the field that stores the provider’s WordPress user/provider ID;
- the relationship’s Unique Identifier Key;
- the Services post ID that should receive the relationship.
Open Connect Relation #
Go to:
WordPress Admin → Nelx JFB Email Templates → Form Templates
Open the relevant template.
Turn on:
Connect Relation
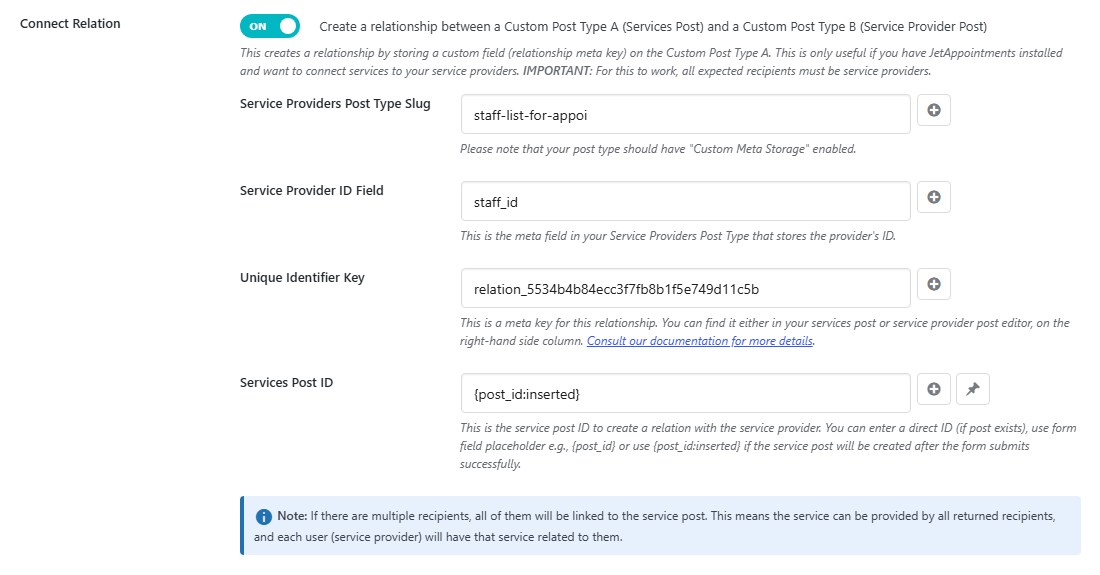
The following settings appear:
- Service Providers Post Type Slug
- Service Provider ID Field
- Unique Identifier Key
- Services Post ID
Service Providers Post Type Slug #
Enter the slug of your Service Providers post type.
For example:
service-providersor:
staff_listUse the actual post type slug, not the visible post type label.
The feature uses that slug to locate the provider meta-storage table.
If the slug contains hyphens, they are converted to underscores when the table name is resolved.
For example:
staff-listis resolved as:
staff_list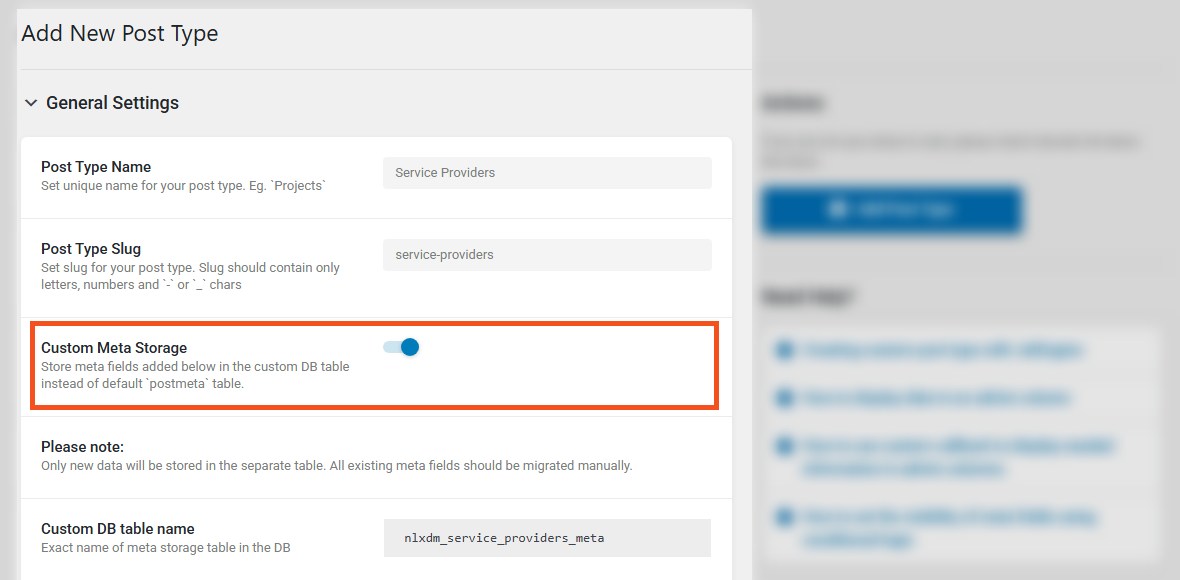
Service Provider ID Field #
Enter the custom field in the Service Providers post type that stores the provider’s WordPress user/provider ID.
For example:
staff_idor:
provider_idor:
user_idThis field is what allows Nelx JFB Email Templates to take an email recipient’s WordPress user ID and find the matching Service Provider post.
Unique Identifier Key #
Enter the meta key used by the relationship.
For example:
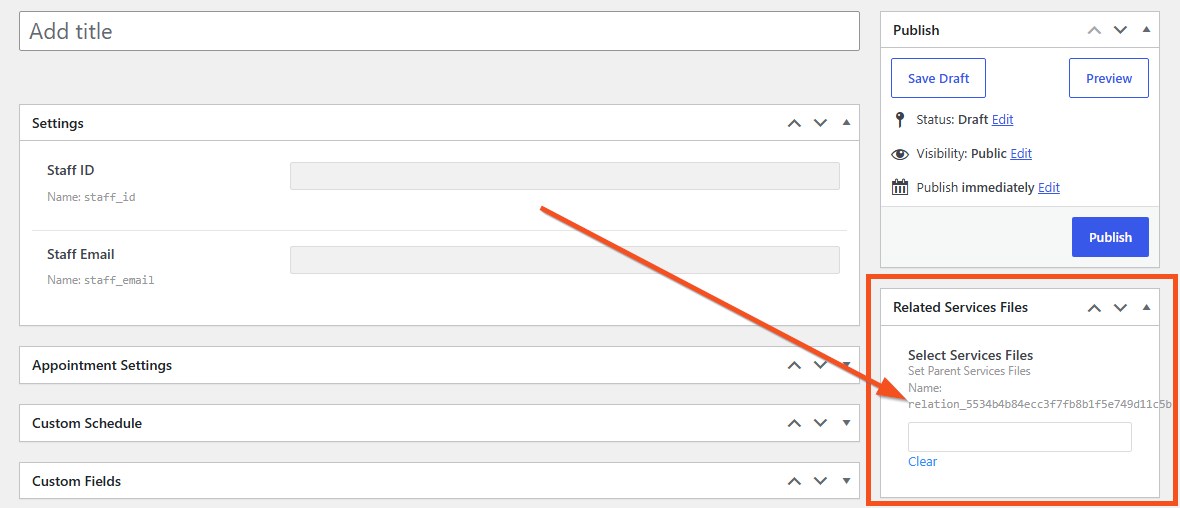
relation_5534b4b84ecc3f7fb8b1f5e749d11c5bThis is the key used to store the related provider post against the Services post.
You can find the relationship key from the relevant Services or Service Provider post setup where JetAppointments exposes the related provider/service relationship.
Use the exact key. A different meta key creates or updates different post meta and will not represent the relationship you intended.
Services Post ID #
Enter the Services post that should be connected to the provider.
You can use:
A Direct Post ID #
Use a number when the Services post already exists.
For example:
4821A Form Field #
Use a normal form placeholder when the form already contains the Services post ID.
For example:
{service_post_id}The Post Created by the Form #
If JetFormBuilder creates the Services post during the same submission, use:
{post_id:inserted}This lets Connect Relation use the post created by the form instead of requiring its ID in advance.
How the Provider Is Found #
When Connect Relation runs, Nelx JFB Email Templates:
- takes the WordPress user ID of the resolved recipient;
- looks in the Service Providers post type’s custom meta-storage table;
- finds the row where Service Provider ID Field matches that user ID;
- gets the provider post’s
object_ID; - stores that provider post ID against the Services post using the Unique Identifier Key.
If the required provider record cannot be found, the relation step is skipped rather than stopping the form submission.
Recipient Requirements #
Connect Relation works from the recipients resolved by the email workflow.
That means those recipients need to correspond to service providers in the configured Service Providers post type.
A recipient who does not have a matching provider record cannot be connected.
Configure your recipient logic first, then add Connect Relation.
For recipient setup, see Recipients & Delivery Options.
Using Connect Relation With Rotation #
Connect Relation can be used with Rotation.
When Rotation selects one recipient, that selected WordPress user is the provider passed into the relation step.
This is useful when a request should be assigned to one provider at a time.
Example:
- A service request form is submitted.
- Rotation selects the next provider.
- The provider receives the email.
- Connect Relation looks up that provider’s Service Provider post.
- The Services post is connected to that provider.
For the assignment setup, see Round-Robin Rotation & Assignment Tracking.
Connect Relation Inside Conditional Recipients #
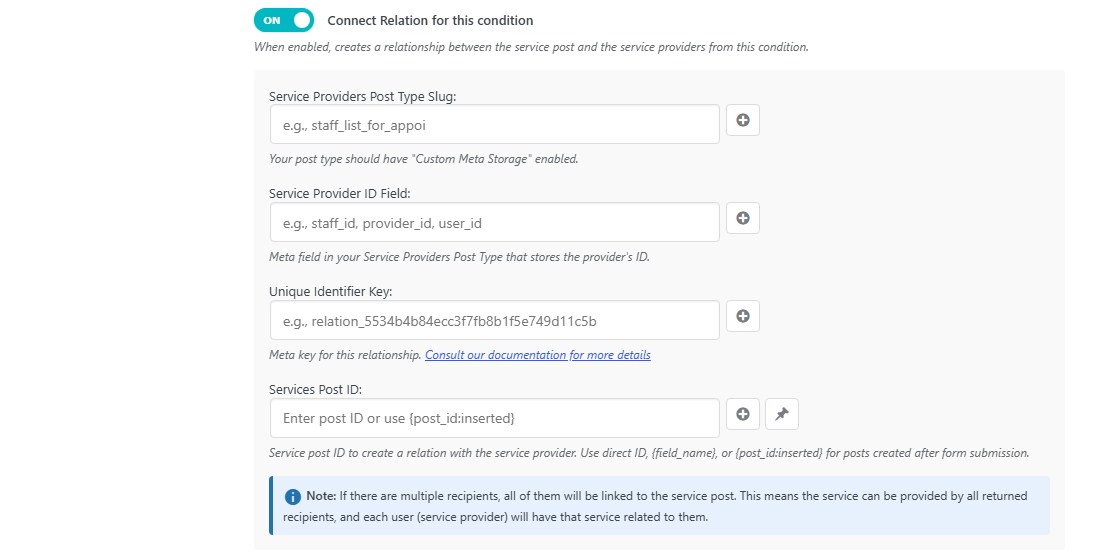
Each Conditional Recipient group can have its own Connect Relation configuration.
Inside a condition, turn on:
Connect Relation for this condition
Then configure that condition’s:
- Service Providers Post Type Slug;
- Service Provider ID Field;
- Unique Identifier Key;
- Services Post ID.
This lets different routing rules use different provider or service relationship settings.
For example, one form could route different service categories to different provider groups while still creating the provider relationship for whichever condition matched.
For the condition setup, see Conditional Recipients & Routing Rules.
A Practical Example #
Suppose you have:
Services post type
service-requestService Providers post type
service-providersProvider ID field
provider_idRelationship key
relation_5534b4b84ecc3f7fb8b1f5e749d11c5bThe form creates the service request post, so Services Post ID is:
{post_id:inserted}The email template uses Rotation to choose one provider.
When the form is submitted:
- the service request post is created;
- Rotation selects the recipient;
- the provider receives the email;
- Connect Relation finds the Service Provider post whose
provider_idmatches that user’s ID; - the provider post ID is stored against the new service request using the relationship key.
If the Relation Is Not Created #
Check these points:
- Connect Relation is enabled.
- The recipient resolves to a WordPress user who is also one of your service providers.
- The Service Providers Post Type Slug is correct.
- Custom Meta Storage is enabled for the Service Providers post type.
- Service Provider ID Field is the field that actually contains the recipient’s user/provider ID.
- Unique Identifier Key is the correct relationship meta key.
- Services Post ID resolves to a real post ID.
- If you use
{post_id:inserted}, confirm that the JetFormBuilder submission creates the Services post. - If Connect Relation is inside a Conditional Recipient group, confirm that the condition actually matched.
- If Rotation is enabled, confirm which provider was selected for that submission.
A missing provider record is skipped silently, so checking the provider ID field is especially important.
If Your Post Type Slug Contains Hyphens #
Enter the normal post type slug.
Nelx JFB Email Templates converts hyphens to underscores when it resolves the custom meta-storage table.
You do not need to manually change the post type slug in WordPress.
Where to Go Next #
For choosing the service-provider recipients, see Recipients & Delivery Options.
For one-provider-at-a-time assignment, see Round-Robin Rotation & Assignment Tracking.
For different provider rules based on form answers, see Conditional Recipients & Routing Rules.


