This is where you create and send notifications to users as an admin. The tab has three sections: field mapping, frontend loading controls, and notification creation.
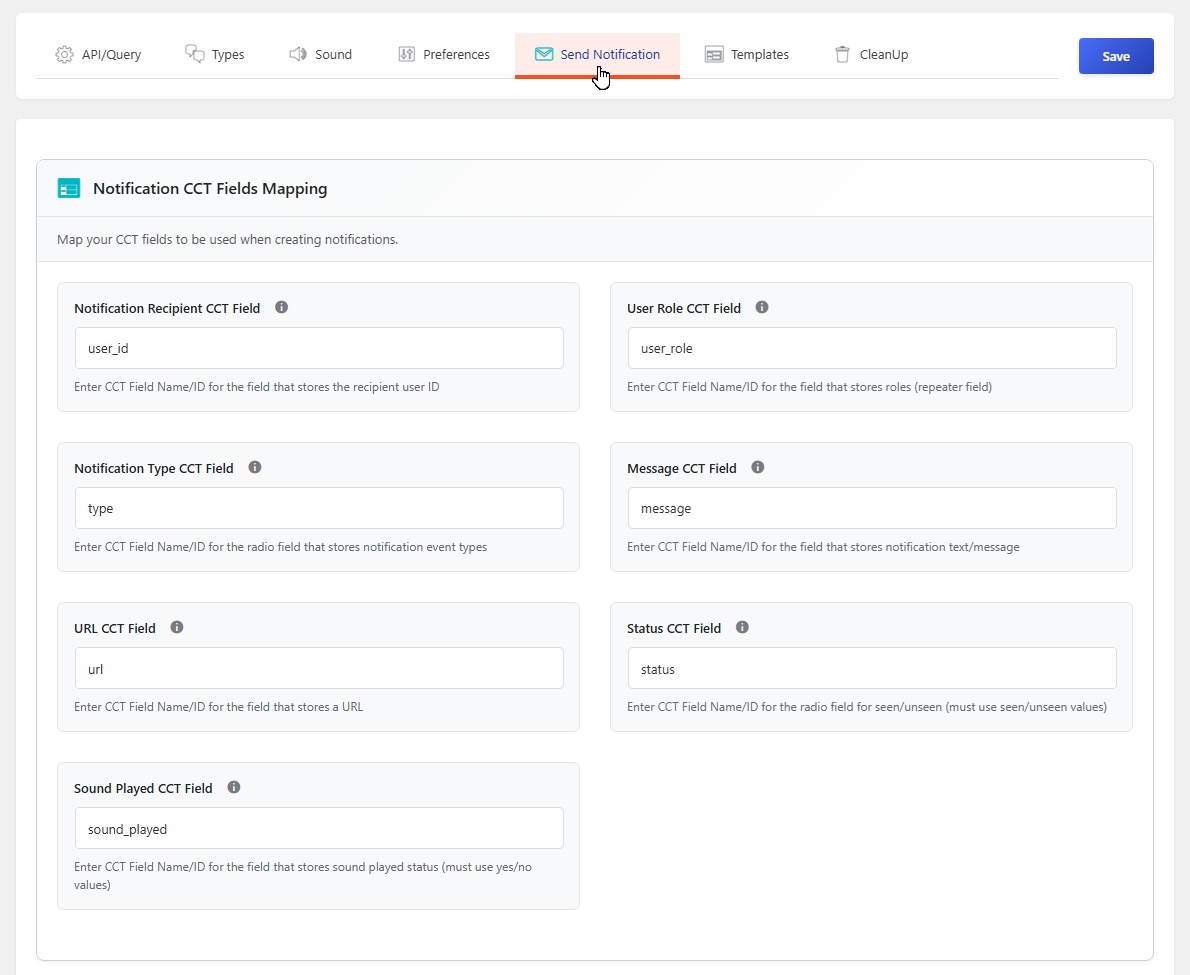
Section 1: Notification CCT Fields Mapping #
Before sending notifications, you need to tell the system which fields in your CCT store which pieces of information.
Important Note About Field Names #
The values you enter here must exactly match your CCT field names. If your CCT uses user_id as the field name, you must enter user_id here — not userid or recipient_id.
| Field | Description | Example |
|---|---|---|
| Notification Recipient CCT Field | The field that stores the recipient’s user ID | user_id |
| User Role CCT Field | For role-based notifications (must be a repeater field) | user_role |
| Notification Type CCT Field | The field that stores the notification type | type |
| Message CCT Field | The field that stores the notification text | message |
| URL CCT Field | The field that stores an optional URL | url |
| Status CCT Field | The field for “seen” and “unseen” status (must use these exact values) | status |
| Sound Played CCT Field | The field for sound played status (must use “yes” and “no”) | sound_played |
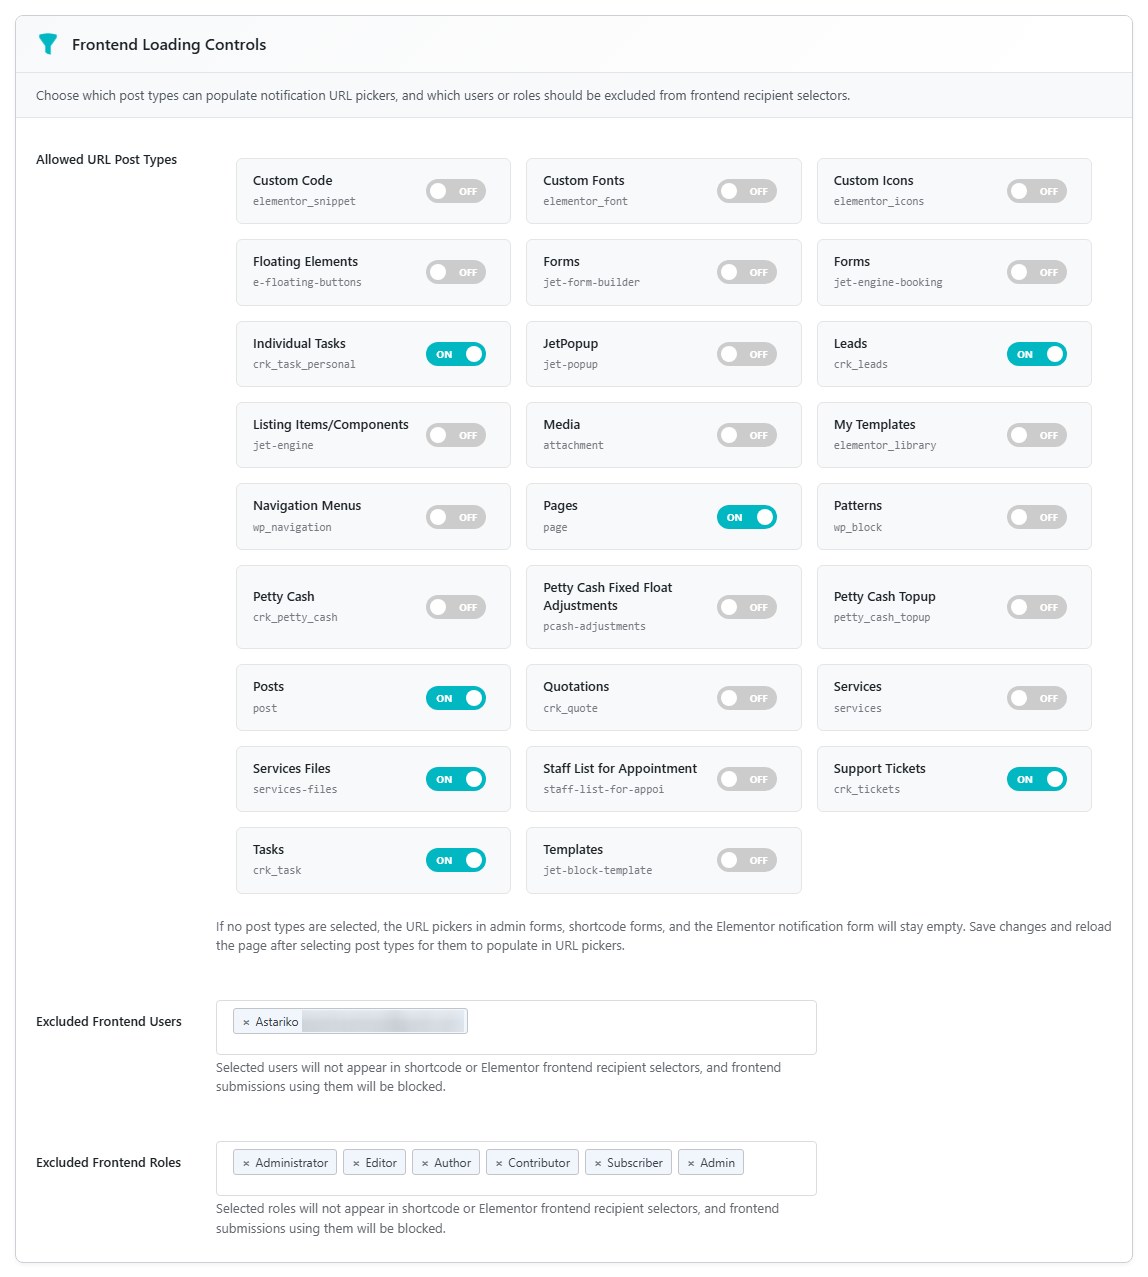
Section 2: Frontend Loading Controls #
This section controls which post types URL appears in URL picker dropdown (for both backend and frontend notification forms) and which users/roles can be selected as recipients on the frontend form.
Allowed URL Post Types #
Select which post types can populate the URL picker dropdown in frontend notification forms. When a user creates a notification via the frontend form, they can select a page or post from these allowed post types as the notification URL.
- How it works: Toggle on the post types you want to appear in URL pickers
- Default behavior: If no post types are selected, the URL picker will remain empty
- Important: Save changes and reload the page after selecting post types for them to populate in URL pickers
Example: If you select “Pages” and “Posts”, users will see these options when picking a URL for their notification.
Excluded Frontend Users #
Select users who should not appear as recipient options on frontend notification forms.
- Purpose: Prevent certain users from being selected as notification recipients on the frontend
- How it works: Selected users will not appear in recipient selectors (shortcode or Elementor)
- Security: Frontend submissions attempting to send notifications to excluded users will be blocked
Example: Exclude admin accounts so they cannot be selected as recipients by frontend users.
Excluded Frontend Roles #
Select user roles that should be excluded from frontend recipient selectors.
- Purpose: Hide entire user roles from the roles options in frontend forms
- How it works: Selected roles will not appear as recipient options
- Security: Frontend submissions targeting excluded roles will be blocked
Example: Exclude the “Subscriber” role if you only want logged-in members to receive notifications.
Section 3: Notification Creation Form #
Once your fields are mapped, you can create notifications.
Recipient (s) Selection #
Choose how you want to specify recipients:
| Recipient Type | What It Means |
|---|---|
| Standard (Manual User IDs) | Enter user IDs directly (e.g., 1, 2, 3) |
| User IDs (Select from users) | Search and select users from a dropdown |
| User Roles | Select one or more user roles |
How Recipients Work #
For Single User IDs:
- One notification is created for that specific user
- Their user ID is stored in the recipient field
For Multiple User IDs:
- Separate notifications are created for each user
- Each notification has the same message and details
- Each user gets their own copy
For User Roles:
- One notification is created with all selected roles
- The roles are stored in the repeater field
- The notification system will show it to all users with those roles
Notification Type #
Select from the types you configured in the Notification CCT type radio field. This dropdown is automatically populated from your CCT configuration.
Message #
Enter the notification text. This is what users will see in their notification list.
URL (Optional) #
Add a link that users can click to see more details:
- Enter a URL manually, or
- Click the dropdown to search and select a page or post from your site (limited to post types selected in Frontend Loading Controls)
When users click “See details”, they’ll be taken to this URL. For more details about the dropdown, please see Elementor Widgets section.
Sending the Notification #
- Fill in all required fields
- Click Send Notification
- A success message shows how many notifications were created
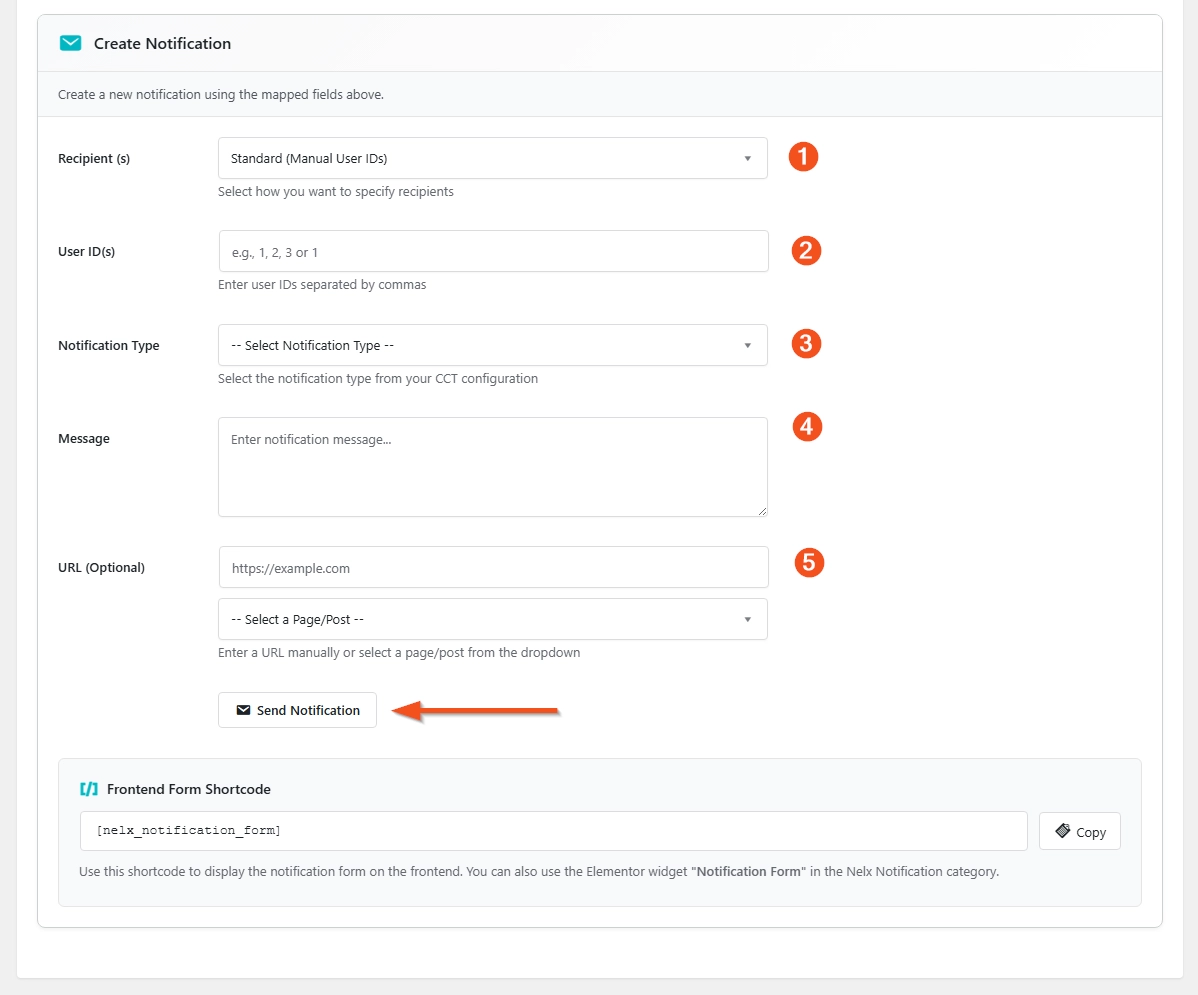
Frontend Form Shortcode #
Use this shortcode to display the notification form on your frontend pages:
[nelx_notification_form]Note: The frontend form respects the Frontend Loading Controls settings:
- Only allowed URL post types appear in the URL picker
- Excluded users and roles cannot be selected as recipients
You can also use the Notification Form Elementor widget in the Nelx Notification category.


